安装过程
DNS: 223.5.5.5,需要联网
换源(转载自 Tismagic:PVE8.1 下软件源更新与其它配置)
 1
 2
 3
 4
 5
 6
 7
 8
 9
10
11
12
13
14
15
16
17
18
19
20
21
22
23
24
25
26
27
28
29
30
31
32
33
34
35
36
37
38
39
40
41
42
43
44
45
46
47
48
49
50
51
52
53
54
55
|
# 1. 更新debian 软件源
#(任选一个源)
#1.1.1 清华源
# 参考: https://mirrors.tuna.tsinghua.edu.cn/help/debian/
sed -i.bak "s#ftp.debian.org/debian#mirrors.tuna.tsinghua.edu.cn/debian#g" /etc/apt/sources.list
sed -i "s#security.debian.org#mirrors.tuna.tsinghua.edu.cn/debian-security#g" /etc/apt/sources.list
#apt update && apt-get install -y apt-transport-https ca-certificates  --fix-missing

#1.1.2 中科大源
# 参考: https://mirrors.ustc.edu.cn/help/proxmox.html
sed -i.bak 's|^deb http://ftp.debian.org|deb https://mirrors.ustc.edu.cn|g' /etc/apt/sources.list
sed -i 's|^deb http://security.debian.org|deb https://mirrors.ustc.edu.cn/debian-security|g' /etc/apt/sources.list
#apt update && apt-get install -y apt-transport-https ca-certificates  --fix-missing

#1.1.3 aliyun源
sed -i.bak "s#ftp.debian.org/debian#mirrors.aliyun.com/debian#g" /etc/apt/sources.list     #修改文件的同时, 会创建一个.bak后缀的备份文件
sed -i "s#security.debian.org#mirrors.aliyun.com/debian-security#g" /etc/apt/sources.list  #阿里Debian源
#apt update && apt-get install -y apt-transport-https ca-certificates  --fix-missing

#1.1.4 163源
sed -i.bak "s#ftp.debian.org/debian#mirrors.163.com/debian#g" /etc/apt/sources.list     #163Debian源
sed -i "s#security.debian.org#mirrors.163.com/debian-security#g" /etc/apt/sources.list     #163Debian源
#apt update && apt-get install -y apt-transport-https ca-certificates  --fix-missing

# 2. PVE 软件源
# 删除默认企业源
rm -rf /etc/apt/sources.list.d/pve-enterprise.list

#(任选一个源)
# 2.1.1 清华源
echo "deb https://mirrors.tuna.tsinghua.edu.cn/proxmox/debian bookworm pve-no-subscription" > /etc/apt/sources.list.d/pve-no-subscription.list

# 2.1.2 中科大源
echo "deb https://mirrors.ustc.edu.cn/proxmox/debian/pve bookworm pve-no-subscription" > /etc/apt/sources.list.d/pve-no-subscription.list

#3 CEPH分布式源
#3.1.1 中科大源
echo "deb https://mirrors.ustc.edu.cn/proxmox/debian/ceph-quincy bookworm no-subscription" > /etc/apt/sources.list.d/ceph.list     #中科大源
sed -i.bak "s#http://download.proxmox.com/debian#https://mirrors.ustc.edu.cn/proxmox/debian#g" /usr/share/perl5/PVE/CLI/pveceph.pm     #中科大源

# --------------------------------------------------------
# 更新索引, 升级安装软件包, 重启系统
# --------------------------------------------------------
# 如果无法拉取https软件源时安装
apt update && apt-get install -y apt-transport-https ca-certificates  --fix-missing
apt update && apt dist-upgrade

#4.LXC容器仓库源(CT)
# 4.1.1 中科大源
sed -i.bak "s#http://download.proxmox.com/images#https://mirrors.ustc.edu.cn/proxmox/images#g" /usr/share/perl5/PVE/APLInfo.pm
systemctl restart pvedaemon  # 稍等下手动刷新webui 页面

# 删除订阅弹窗
sed -Ezi.bak "s/(Ext.Msg.show\(\{\s+title: gettext\('No valid sub)/void\(\{ \/\/\1/g" /usr/share/javascript/proxmox-widget-toolkit/proxmoxlib.js && systemctl restart pveproxy.service
# 执行完成后,需注销PVE登录后, 重新启动浏览器
|
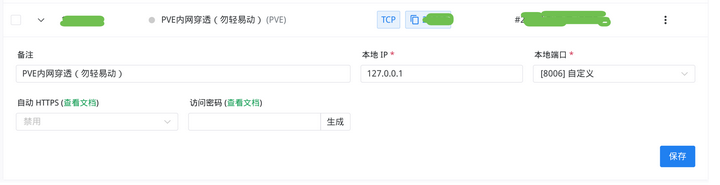
启用内网穿透
https://www.natfrp.com/tunnel/ 申请一个免费节点(本地端口为 8006)
下载 sakura 的 Frpc 文件
1
|
wget https://nya.globalslb.net/natfrp/client/launcher-unix/3.1.0/natfrp-service_linux_amd64.tar.zst
|
假设保存在 /root/Documents/ 下面,cd 到该目录,解压缩,给权限
1
2
3
|
cd /root/Documents
tar -I zstd xvf natfrp-service_linux_amd64.tar.zst
chmod +x ./*
|
先运行一次 ./frpc 生成配置文件,配件文件保存在 ./frpc.ini 中
PVE 系统添加 frpc 自启动
1
|
vim /etc/init.d/sakuraFprc
|
然后编写一个启动脚本,如果你的文件目录跟我放的一样,可以复制粘贴
 1
 2
 3
 4
 5
 6
 7
 8
 9
10
11
12
13
14
15
|
#!/bin/sh

### BEGIN INIT INFO
# Provides: sakuraFrpc
# Required-Start: $network $remote_fs $local_fs
# Required-Stop: $network $remote_fs $local_fs
# Default-Start: 2 3 4 5
# Default-Stop: 0 1 6
# Short-Description: A frpc clients
# Description: A frpc clients
### END INIT INFO

nohup /root/Documents/frpc -c /root/Documents/frpc.ini >/dev/null 2>&1 &

exit 0
|
让 frpc 在系统启动时保持运行
重启,登陆 root, 查看进程是否存在
如果有类似
1
|
/root/Documents/frpc -c /root/Documents/frpc.ini
|
这样的输出就可以了,直接通过 sakura 的 [IP]:[Port] 访问即可